Overview
This article helps you create an Execution Profile. An Execution Profile is useful while synchronizing data multiple times or in an unattended mode (background task).
Who should read this?
- TopTeam Users
Step 1. Run TopTeam Connector for Visual Studio Team System
Refer to the article Configuring TopTeam Connector for Visual Studio Team System.
Step 2. Choose Configure Synchronization Settings

Step 3. Choose Create or Manage Execution Profiles
Step 4. Read the Execution Profile information and click Next
Step 5. Select a TopTeam Project and a Team System Project
Step 6. Choose Define a new Execution Profile
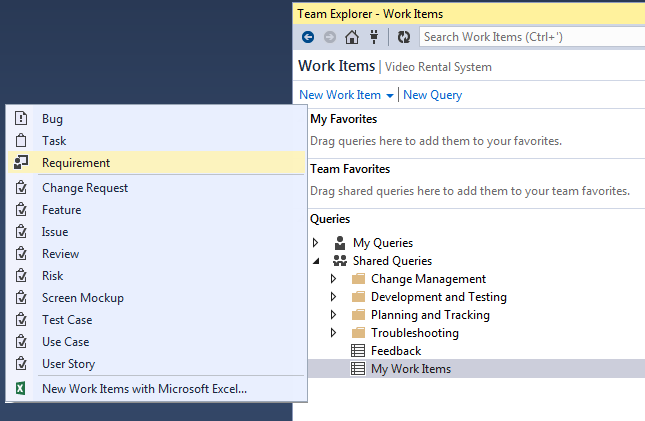
Step 7. Select the Record Types that you want to synchronize
Step 8. Select Add, Update or Delete an operation for the Record Types while exporting or importing during synchronization
The Default Conflict Resolution option is useful when you are performing unattended synchronizations.
Select the action e.g. Skip Record Sync.
This action will commence if a conflict occurs (i.e. a record is modified in both TopTeam and TFS Projects).
Step 9. Apply Filters on Record Types that you want to synchronize
You can restrict the records that will be synchronized by specifying a filter condition.
You can also define new Filters.
Step 10. Select the Requirements Document where you want to import new Requirements from TFS to TopTeam
Select a Requirements Document for importing orphan requirements.
NOTE: While importing new Requirements from TFS, the child requirements will be imported into their respective parent Requirements Documents. The new requirement work items which do not have parents, will be imported into the selected Requirements Document.
Step 11. Select the Link Types that you want to synchronize
Step 12. View Execution Profile Summary
Step 13. Enter a Name for the Execution Profile
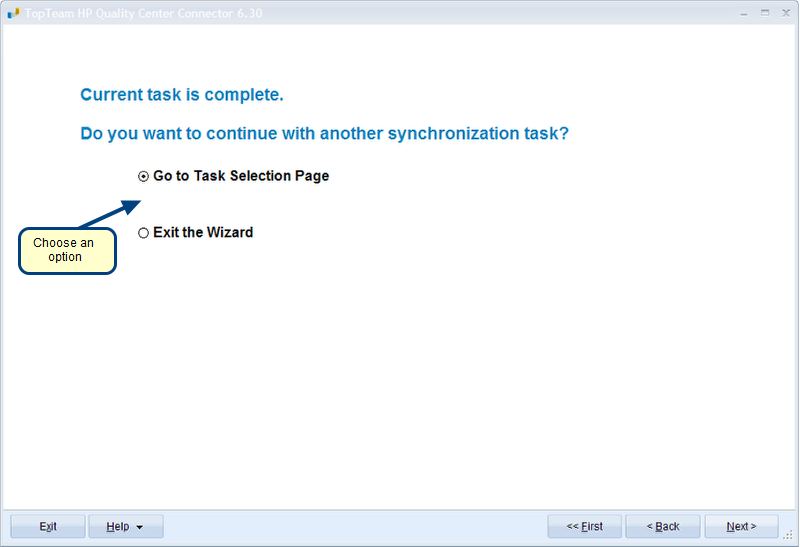
Step 14. The Execution Profile is saved
See Also
Synchronizing records between TopTeam and TFS repositories using TopTeam VSTS Connector
Defining a Synchronization Scheme for TopTeam VSTS Connector
Creating synchronization parameter file for TopTeam VSTS Connector
Creating custom Work Item Types or Work Item Type fields on TFS using TopTeam VSTS Connector
Revised: April 26th, 2018