Overview
This article will help you to understand how to synchronize records of the selected Record Types and their Links between TopTeam and Visual Studio Team System (VSTS or TFS).
Who should read this?
- TopTeam Users
What does synchronizing records between TopTeam Repository and VSTS mean?
When you Synchronize Records, you are adding, updating and deleting Records and their Links between TopTeam Repository and VSTS.
Who can synchronize records between TopTeam and Team Foundation Repositories?
The user must have permissions for adding records to, and be a member of, the Team System project from which records will be synchronized.
Step 1. Run TopTeam Connector for VSTS
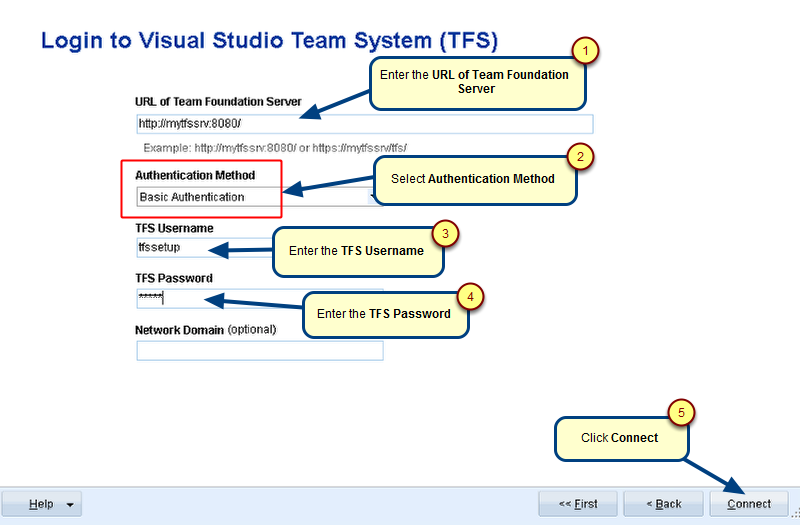
Refer to the article Configuring TopTeam Connector for Visual Studio Team System.
Step 2. Choose the Synchronize Data option

Step 3. Read the Synchronize Records information and click Next
Step 4. Select the TopTeam and Team System projects that you want to synchronize
Step 5. Choose an Execution Profile (optional)
The Connector will start the synchronization process using an existing execution profile.
Step 6. The following page is shown when the Preview Records option is selected
Step 7. Start the Synchronization
Step 8. Select the options for using an existing profile to display and modify the profile
All the pages of the Synchronization Profile will be displayed. You can modify these settings as required.
Refer to the article Creating Execution Profile for TopTeam VSTS Connector for modifying the Synchronization Profile.
Step 9. Specify the settings to be used for synchronization
Refer to the article Creating Execution Profile for TopTeam VSTS Connector for defining custom synchronization settings.
Step 10. Define your own custom settings
Step 11. Save the execution profile
Step 12. Enter a Name and Description (optional) for the Execution Profile
After saving the profile you can begin the Synchronization process.
The following images show the synchronized records in VSTS:
Requirements Tree
Screen Mockups
Use Cases and Use Case Flow Diagrams
Test Case Steps
Test Case Steps and Tested Requirements tab
Test Case Steps and All Links tab
Traceability
Work Items Tree
See Also
Revised:April 26th, 2018