Overview
This article explains how to create a Project Branch in TopTeam. You can either create a Complete or Sparse branch.
In Complete branch, all records of the selected record types will be branched whereas in Sparse branch, you can select desired records of the selected record types to create a branch.
Who should read this?
- TopTeam Users
- Project Admins
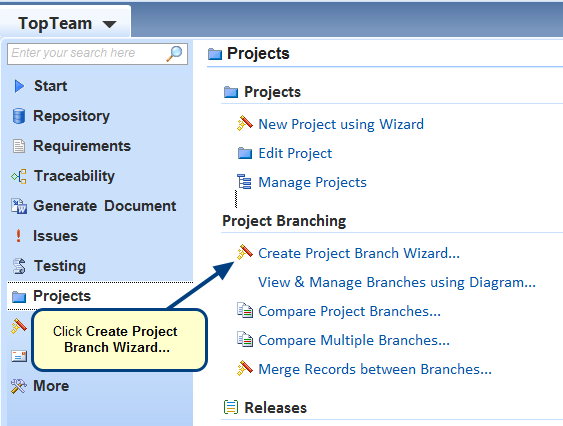
Step 1. Go to TopTeam main menu and click Create Project Branch Wizard…

Step 2. Create Branch Wizard opens
Step 3. Choose the Create a branch for a single Project option
For information on creating branches for a set of Projects, refer to the article How to create multiple Project Branches from a set of Projects using wizard.
Step 4. Select a source Project from which you want to create a branch
Step 5. Choose the From the current Project option
NOTE: Choosing this option will create a branch which will have records that are present in the current Baseline.
You can create a Project branch from a Baseline as shown below.
Step 6. Specify if you want to create a new branch at either Project’s root or Sub-Project level
NOTE: If you choose the Sub-Project option, you will need to specify the Project under which the new branch is to be created.
Step 7. Select repository objects that you want to allow in the new branch
Step 8. Select Issue types that you want to allow in the new branch
Step 9. Choose the Let me select records option to create a sparse branch
NOTE: If you choose the Take all records option, jump to step no. 14. directly.
Step 10. Select the desired records to include in the new branch
NOTE: Only the selected records will be included in the new sparse branch.
Step 11. Specify if you want to branch linked records
NOTE:
- Selecting this option will include records which have traceability relationships with the records included in the branch.
- You can specify the depth of traceability by selecting the levels of traceability.
- Selecting the Query traced records that are upstream (incoming) to branched records option will query records which have Traces Into links to the branched records.
- Selecting the Query traced records that are downstream (outgoing) from branched records option will query records which have Traces From links from the branched records.
Step 12. Select the linked records that you want to branch
NOTE: Records previously selected for branching, are not available for selection on this page.
Step 13. Select a filter to limit the number of issues to be included in the new branch
Step 14. Enter the name of the new branch
Step 15. View Summary and click Create Branch
Step 16. View Action log
Step 17. View created Branches and click Finish
The new branch has been created successfully