Overview
You can add or customize a document template to generate review documents for OneView that are sent for review and approval.
This article describes the procedure to add and customize a document template.
Who should read this?
- TopTeam Administrators
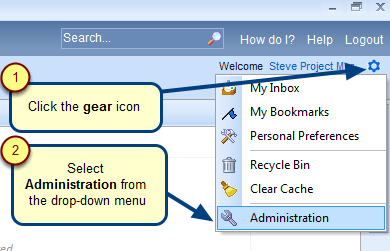
Step 1. Open the Administration screen
Step 2. Click Configure OneView Settings
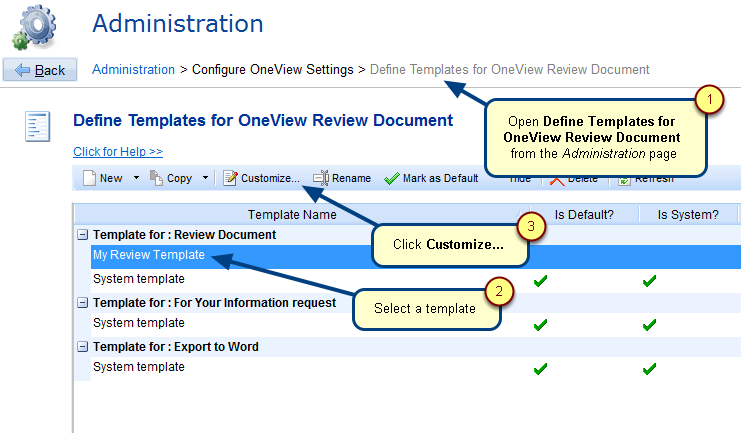
Step 3. Click Define Templates for OneView Review Document
The Define Templates for OneView Review Document screen opens
Step 4. Add a new Review Document Template
Customize Template Wizard… opens
Step 5. Enter Name and Description (Optional) for OneView Review Document
Step 6. Customize the template
Step 7. The template opens in Microsoft Word. Customize it as desired and click Save.
Step 8. Return to Customize Template Wizard… and click Upload Template
Step 9. The template will be uploaded into the repository
The template is now visible in the list
The above process illustrates adding and customizing a new template. You can also customize an existing template.
Let’s see the procedure on how to customize an existing template.
Step 10. Select an existing template that you want to customize
For the next steps, follow the procedure as shown above from Step 5 to Step 9.
See Also
Revised: December 4th, 2016


