|
Add Screen Prototypes (or Screen Mockups) to the Repository |

|

|

|
|
|
Add Screen Prototypes (or Screen Mockups) to the Repository |
|
|
|
Add Screen Prototypes (or Screen Mockups) to the Repository
|
Add Screen Prototypes (or Screen Mockups) to the Repository |
|
|
|
|
|
Add Screen Prototypes (or Screen Mockups) to the Repository |
|
|
|
Overview
TopTeam provides the capability to add Screen Prototypes or Screen Mockups to the Repository. You can use this capability to capture all proposed and existing screen designs. You can also link the Screen Mockups to specific Use Case steps.
NOTE
|
To build Screen Wire frames/Mockups from scratch within TopTeam Analyst you need to include the Screen Mockups Record Type in the current Project.
Screen Mockups editor is only available in advanced edition of TopTeam.
|
You can then simulate your application prototype by pairing the Screen Mockups with the automatically generated Use Case Flow Diagram.
The Screen Prototypes added to the Repository can also be automatically inserted into your custom system specifications document that can be automatically generated by TopTeam.
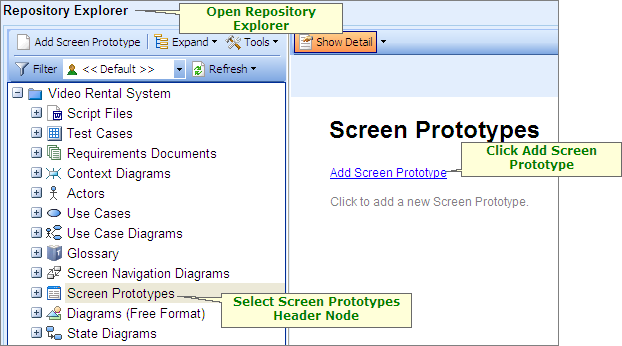
Adding Screen Prototypes to the Repository
Open the Repository Explorer and click on the Screen Prototypes header node. Click on Add Screen Prototype.
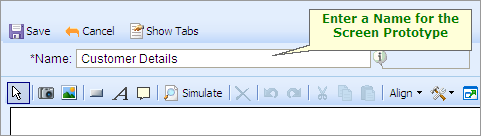
Enter a Name for the Screen Prototype.
Now we can capture the screen design made in another application. Screen Prototypes are added to the Repository by using the screen capture tool or by importing an image file.
| 1. | Open the application where you have designed the Screen Prototype such as TechnoSolutions' product Visual Prototype Designer, Visio, PowerPoint, etc. You can also capture the screen design from an existing application. Open the application and navigate to the screen that you want to capture. |
| 2. | Return to TopTeam. |
| 3. | Click on the Screen Capture icon on the toolbar. TopTeam will minimize and enter Screen Capture mode. |
![]()
Drag the cursor on the screen to define the rectangular area that you want to capture and release the mouse button. The selected area will be captured into the Screen Prototype editor.
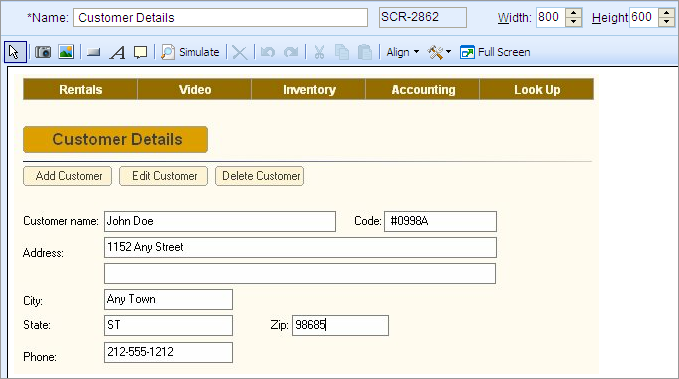
Set the height and width of the canvas to match the captured screen image and save the record.
Step Complete
You have now successfully added a Screen Prototype (or Screen Mockup) to the Repository.
Repeat these steps for all the Screen Prototypes that you want to add to the repository and then proceed to the next step.